Installing a toilet in your own home may seem complicated, but with the right tools, preparation, and guidance, it can be a manageable project for DIY enthusiasts. Whether you’re replacing an old toilet, upgrading to a wall-mounted unit, or moving into a new house, this guide will walk you through the installation process step by step. You’ll also learn how to avoid common pitfalls like leaks, floor damage, or mismatched fittings.
By the end of this guide, you’ll feel confident enough to install a toilet on your own or know whether calling a professional plumber is the better option.
Schedule Service Online
Get a free estimate so you know what you're signing up for
"*" indicates required fields
For Emergency Services Call: 410-255-9300
Why Proper Toilet Installation is Crucial
Ensuring your toilet is installed correctly is about more than just making it functional—it can save you from a variety of problems down the road. Here are the key reasons why proper toilet installation is so important:
1. Prevents Leaks
An improperly installed toilet can lead to leaks, which might not always be visible right away. Over time, unnoticed leaks can damage your flooring, subfloor, or even create structural issues in your home. A tight seal and correct connections are essential to avoid water damage and costly repairs.
2. Improves Efficiency
A properly installed toilet ensures optimal flushing performance and water usage. When components like the wax ring, flange, or tank fittings are correctly positioned, the toilet will function efficiently, reducing water waste and lowering your water bill.
3. Avoids Odors
A poorly sealed toilet can allow sewer gases to escape into your bathroom, creating unpleasant odors and potential health risks. Proper installation guarantees an airtight seal that keeps your bathroom fresh and free from bad smells.
4. Ensures Stability
If a toilet is not securely fastened to the floor, it can wobble, shift, or even crack over time. A steady and stable toilet is both safer to use and prolongs the life of the fixture, saving you from premature replacements.
5. Prevents Frequent Repairs
Improper installations can lead to recurring issues such as clogging, running water, or loose components. Avoid the frustration and expense of frequent maintenance by starting with a correct installation.
6. Maintains Hygiene
A correctly installed toilet minimizes the risk of wastewater seepage and bacterial growth. This ensures your bathroom remains a clean and hygienic environment for your household.
Proper toilet installation isn’t just about convenience—it’s about safeguarding your home, your budget, and your quality of life. Taking the time to install it the right way, or hiring a professional, can save you from significant issues later on.
Why Consider DIY Toilet Installation? (READ ABOVE!)
A toilet is one of the most frequently used fixtures in your house, so having it properly installed is critical. When you take on this project yourself, you can save hundreds of dollars on professional installation services. Plus, there’s a certain satisfaction in knowing you’ve made a tangible improvement to your home.
That said, not all toilet installations are created equal. The difficulty of the task depends on factors like whether you’re replacing your current toilet, installing a new one in a different location, or accommodating different types of toilets (e.g., floor-mounted vs. wall-mounted).
Installation projects typically take about 2-4 hours for someone with beginner-to-intermediate plumbing skills. If you’re comfortable handling basic tools and following detailed instructions, you’re off to a great start.
Before we get started, here’s a quick rundown of what you’ll need for the job.
Consider calling in the professionals at MD Sewer and Plumbing to install your toilet so you can rest assured that your toilet will be promptly and properly installed.
Tools and Materials You’ll Need
Before you begin, make sure you have the following tools and materials ready:
- Tools: Adjustable wrench, flathead screwdriver, hacksaw (for bolt trimming), level, and a putty knife.
- Materials: New toilet (including the bowl and tank), wax ring or rubber flange seal, toilet bolts, toilet base caps, silicone caulk, and plumber’s tape.
- Additional Supplies: Old towels, bucket, and gloves for cleanup and safety.
If you’re replacing an old toilet, you’ll also want to have a scraper handy to remove old wax or adhesive from the toilet flange. Check your local home improvement store or Lowe’s for everything you need.
Step-by-Step Toilet Installation Process
1. Prepare the Bathroom for Work
Start by turning off the water supply to your current toilet. Flush the toilet to drain as much water as possible from the tank and bowl. Use a sponge or towel to absorb any remaining water.
If you’re replacing an old toilet, the estimated time of the project may be a little longer. Follow these steps:
- Disconnect the water supply line by loosening the nut that connects it to the tank.
- Unscrew and remove the bolts at the base of the toilet using your adjustable wrench.
- Carefully lift the old toilet and place it on a towel or cardboard to avoid scratching the floor.
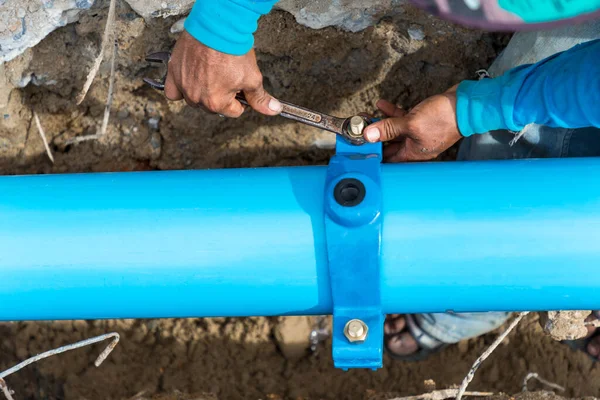
Inspect the toilet flange for signs of water damage or wear. Replace the flange if you notice cracks or corrosion to ensure a secure connection between the toilet base and the drain pipe. This is also the time to address any subflooring issues, such as mold or rotting, before proceeding.
2. Install a New Wax Ring or Seal
A proper seal is critical to prevent leaks. Position a new wax ring or rubber flange seal around the toilet flange. Wax rings are a popular choice, but modern rubber seals are easier to install and offer added reliability against leaks.
3. Position the New Toilet Bowl
Gently lower the new toilet bowl onto the flange, aligning it with the bolt holes. Press down to compress the wax ring and create a watertight seal. A helping hand is useful here to ensure everything stays leveled while you position the base.
Once the bowl is in place, hand-tighten the bolts evenly to secure it, but be careful not to over-tighten, as this can crack the porcelain. Use a hacksaw to trim any extra length from the bolts if needed, then cover them with the provided bolt caps.
4. Attach the Tank to the Bowl
Most toilets come in two pieces (the bowl and the tank). Following the manufacturer’s instructions, attach the tank to the bowl using the provided hardware. A small foam or rubber gasket typically goes between the two pieces to prevent leaks.
Tighten the nuts evenly and check with a level to ensure the tank sits straight. Test for a snug fit without placing too much pressure on the porcelain.
5. Reconnect the Water Supply
Reconnect the water supply line to the base of the tank and use plumber’s tape on the threads for added leak protection. Turn the water back on slowly to avoid bursts of pressure.
Once the tank begins to fill, check for leaks around the base, supply line, and connection points. If you notice any leaks, adjust the fittings accordingly.
6. Seal and Test
Apply a thin bead of silicone caulk around the base of the toilet where it meets the bathroom floor. This helps prevent water damage from spills or cleaning and keeps the unit stable.
Flush the toilet several times to ensure it’s operating correctly and check for any leaks around connections or the wax ring seal.
Additional Tips for Success
- Choose the Right Toilet for Your Space: Make sure your new toilet’s specifications match the rough-in measurements of your bathroom (commonly 12 inches from the wall to the center of the flange).
- Safety First: Always lift with your knees rather than your back when moving heavy items like the toilet bowl or tank.
- Address Any Underlying Issues: Dealing with damaged flooring or leaks early can save you from costly repairs later.
- Wall-Mounted Toilets: If you’re installing a wall-mounted unit, additional steps will involve securing a frame to the wall and testing for structural integrity. These projects typically require advanced plumbing skills or the assistance of a professional handyman.
![]()
When to Call a Professional Plumber Like MD Sewer and Plumbing
Although many toilet installations can be tackled as a DIY project, some situations call for professional expertise:
- You’re moving the toilet to a new location, which requires re-routing water and waste lines.
- Your bathroom has significant water damage or structural issues that need addressing.
- You’re installing a wall-mounted toilet, which demands precise measurements and wall support.
Hiring a plumber like MD Sewer and Plumbing ensures safety and proper installation, especially for complex projects. Contact us today!
Helpful Resources for Toilet Installation
If you’re looking to learn more about proper toilet installation or related topics, the following resources and articles can provide additional guidance:
- How to Install a Toilet – A Step-by-Step Guide: This comprehensive guide breaks down the toilet installation process into simple, manageable steps with clear instructions and visuals.
- Toilet Installation Tips for Beginners: A perfect resource for first-timers that explains essential tools, techniques, and precautions required for a hassle-free installation.
- Common Toilet Installation Mistakes to Avoid: Learn about the most frequent errors homeowners make during installation and how to steer clear of them.
- How to Choose the Right Wax Ring for Your Toilet: Selecting the appropriate wax ring is critical for a leak-free toilet. This article dives into the factors you need to consider.
- Safety and DIY Projects: Stay safe while tackling your plumbing projects with these essential safety tips, tailored for DIY enthusiasts.
- Toilet Maintenance and Hygiene: Don’t miss this detailed blog post for practical advice on keeping your toilet in excellent condition long after installation.
These resources can serve as valuable tools in solving challenges and ensuring a smooth installation process for your toilet. Be sure to explore each link for the details you need!
Wrapping Up Your Toilet Installation Project
With the right preparation and careful attention to detail, installing or replacing a toilet doesn’t have to be overwhelming. Whether you’re refreshing your bathroom with a new fixture or taking on plumbing projects in your own home, the satisfaction of completing a functional upgrade is worth the effort.
Still unsure about tackling the job on your own? A professional plumber or handyman can help streamline the process and ensure everything is done right the first time. Either way, enjoy the peace of mind that comes with a properly functioning toilet!